Dynamically allocate budget to different timeunits using PowerFx
Feb 28, 2024 • 2 • 411
Table of contents
In this blog a budget allocation formula is introduced to deal with amounts of data of different time periods. Budgets could be daily, monthly or quarterly while registering it once. This creates a mismatch while creating a report.
The budget allocation calculation discussed in this blog allows you to solve this mismatch and it also enables you to easily switch between different time contexts.
End result
The final outcome comprises a form where users can input details and perform calculations for various time units.
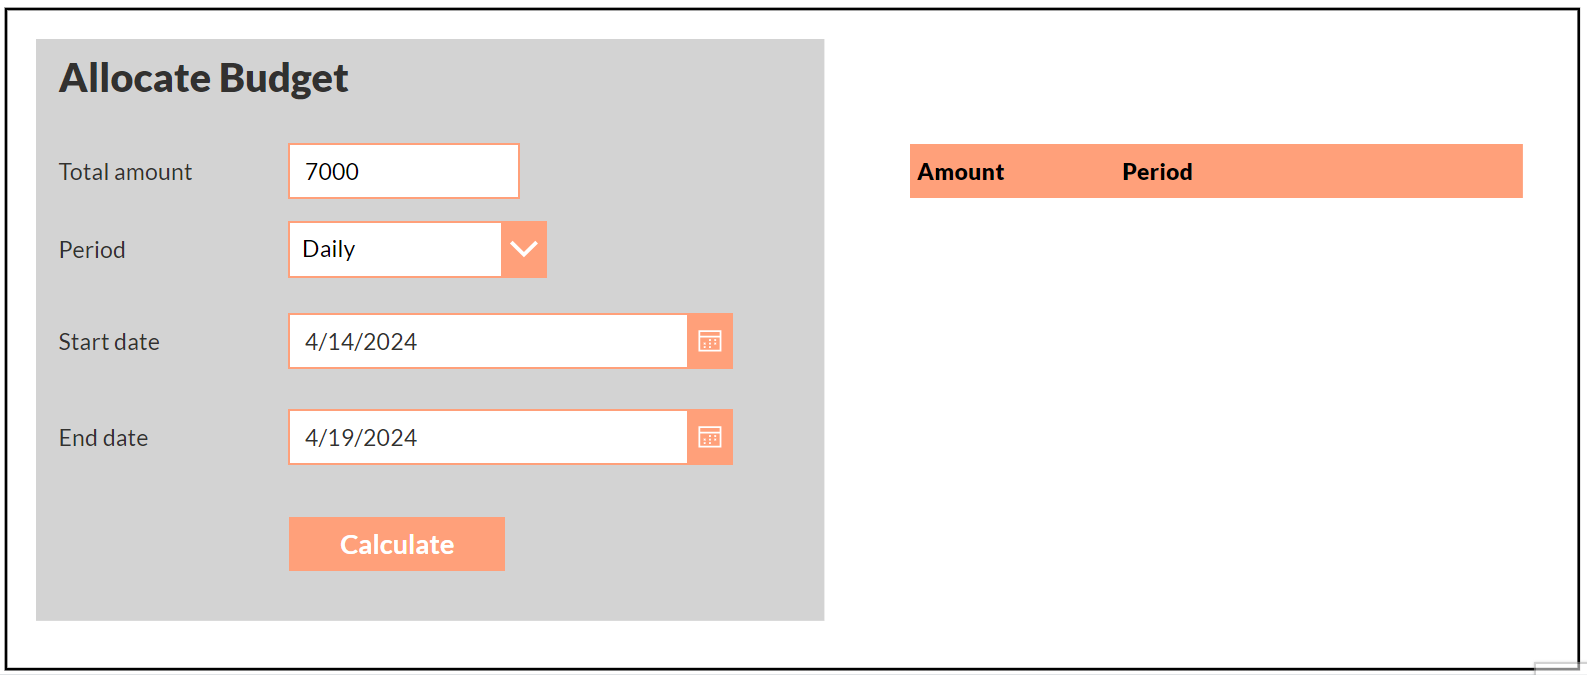
User input
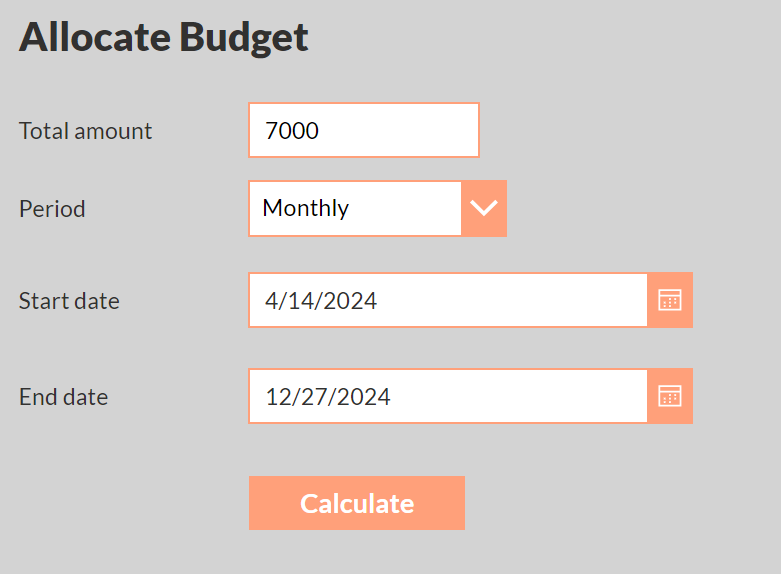
The form contains of the following input fields:
- Total amount (Textinput)
- Period (Combobox) Items to choose from: [“Daily”, “Monthly”, “Quarterly”]
- Start date (Datepicker)
- End date (Datepicker)
Calculation
In PowerFx, utilizing a variable within a ForAll loop is not possible; therefor the button control couldn’t handle the entire calculcation, however, the timer control can be helpful in such cases.
Timer control configuration
The Calculate element on the form looks like a button, but it’s actually the timer control. This control needs some configuration.
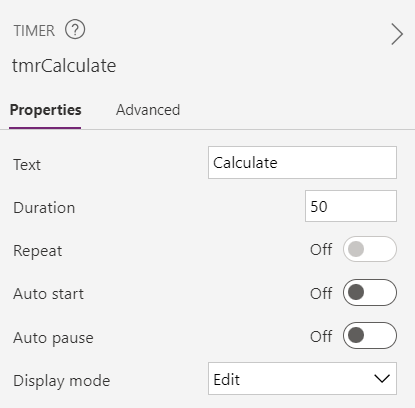
Set Duration to 50.
OnSelect
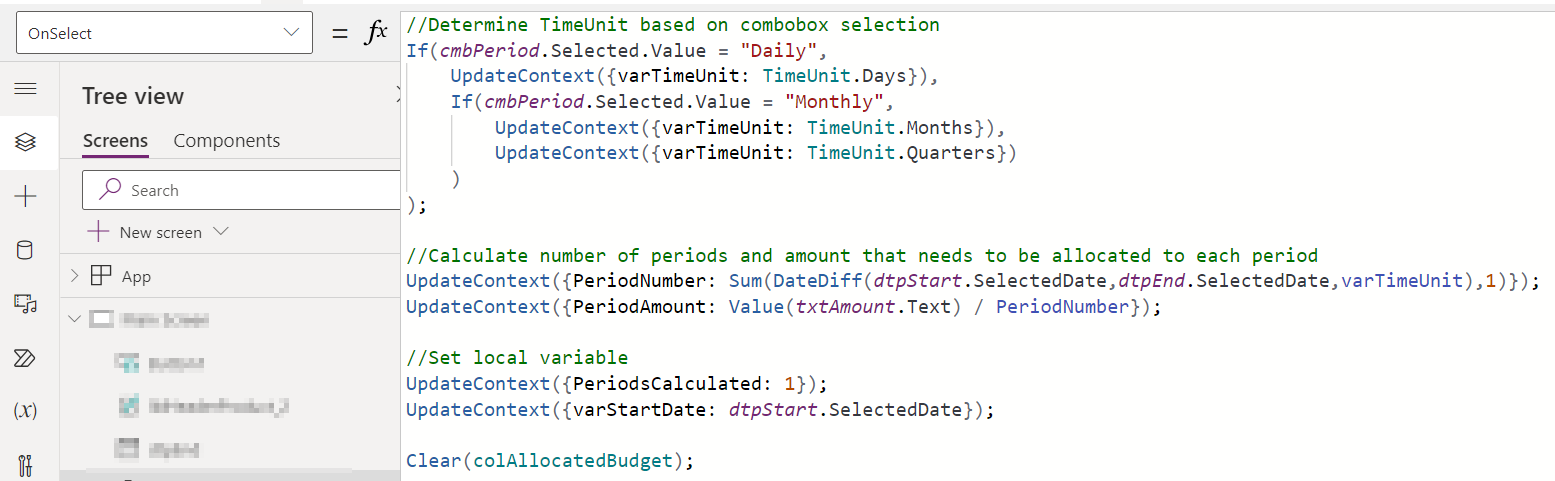
//Determine TimeUnit based on combobox selection
If(cmbPeriod.Selected.Value = "Daily",
    UpdateContext({varTimeUnit: TimeUnit.Days}),
    If(cmbPeriod.Selected.Value = "Monthly",
        UpdateContext({varTimeUnit: TimeUnit.Months}),
        UpdateContext({varTimeUnit: TimeUnit.Quarters})
    )
);

//Calculate number of periods and amount that needs to be allocated to each period
UpdateContext({PeriodNumber: Sum(DateDiff(dtpStart.SelectedDate,dtpEnd.SelectedDate,varTimeUnit), 1)});
UpdateContext({PeriodAmount: Text(Value(txtAmount.Text) / PeriodNumber,"€#.##")});

//Set local variable
UpdateContext({PeriodsCalculated: 1});
UpdateContext({varStartDate: dtpStart.SelectedDate});

Clear(colAllocatedBudget);
The ‘PeriodNumber’ is determined using a DateDiff combined with Sum formula. Omitting this calculation will lead to an incomplete result in this scenario. For instance, if the start date is 04-04-2024 and the end date is 04-06-2024, only two rows of budget allocation will be generated, omitting 04-06-2024.
OnTimerEnd

Collect(
    colAllocatedBudget,
    {
        Amount: PeriodAmount,
        Period: If(varTimeUnit = TimeUnit.Days,Text(varStartDate,"dd-mm-yyyy"),
            If(varTimeUnit = TimeUnit.Months,Text(varStartDate,"mm-yyyy"),
               Concatenate("Q", Text(RoundUp(Month(varStartDate) / 3, 0)), "-", Text(varStartDate, "yyyy"))
        ))
    }
);
UpdateContext({PeriodsCalculated: PeriodsCalculated + 1});
UpdateContext({varStartDate: DateAdd(varStartDate,1,varTimeUnit)});
The OnTimerEnd fills the collection with the amount that needs to be allocated and the period in which the amount needs to be allocated.
Repeat

PeriodNumber > PeriodsCalculated
The repeat parameter specifies the number of repetitions. Therefore, the total number of calculations will be compared to the number actually performed.
Final step
The final step involves configuring a gallery to showcase the contents of the collection, which will automatically refresh upon completion of a calculation.
Setting up a system to distribute budget across different time frames can be helpful for managing finances effectively. By following the steps detailed in this blog, you can make this process possible in Power Apps Canvas.