Export Dataverse data to Excel triggered from Canvas app
Sep 12, 2025 • 2 • 330
Table of contents
Introduction
Over a year ago I already wrote stated something we jokingly say: “What is the most frequently used functionality of an ERP system?”, with as the answer: “…the export to Excel”.
It is still an often request, which is there by default while creating a Model Driven app, while end-users often would like to export data in a Canvas app as well. This blog describes how to create a Power Automate flow which you can trigger via Canvas app to export the data from Dataverse into Excel.
Step by step
The steps which needs to be done:
- Set up the Fetch XML
- Setup the Layout XML
- Export the data
- Save the file
Setup the FetchXML
The easiest way is to do this via a Model Driven App and select to edit filters and downloading the FetchXML. Select the filters from the result you want to be able to download:

Download the FetchXML and paste the outcome into a compose action:

Setup the LayoutXML
From the edit columns select which columns you would like to have and download the LayoutXML.

Download the LayoutXML and paste the outcome into another compose action:
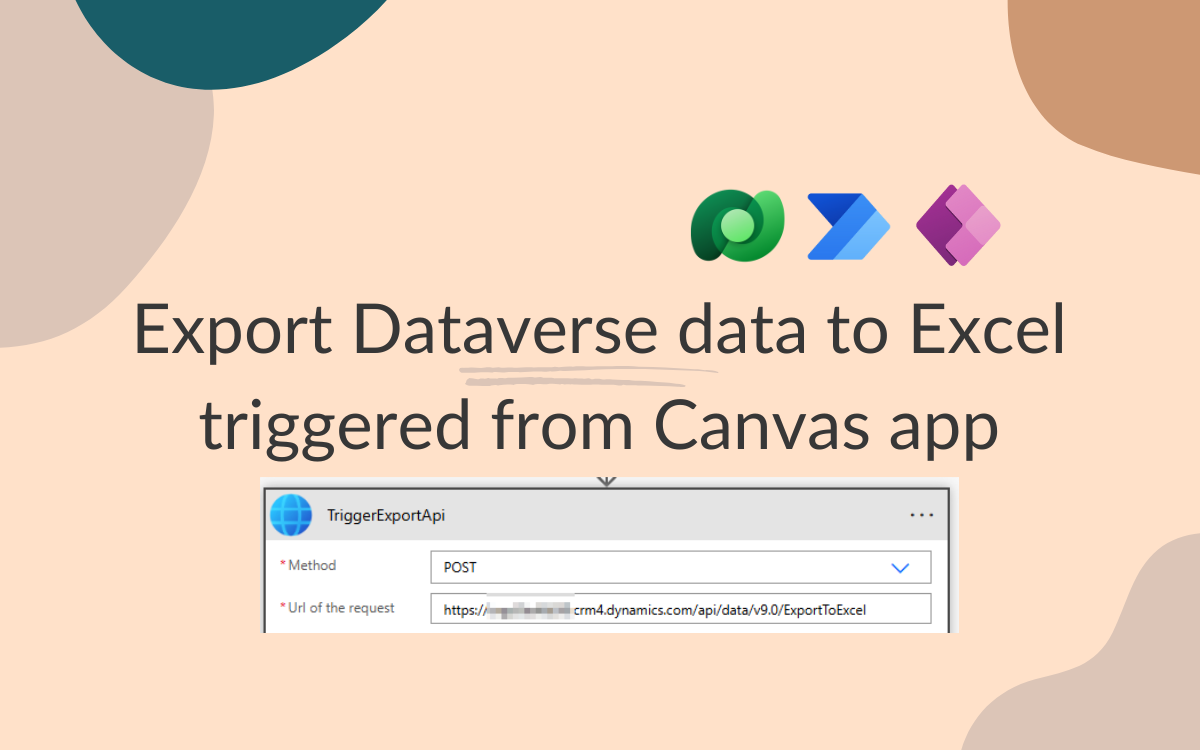
Export the data
You can use the ‘HTTP with Microsoft Entra ID (preauthorized)’ action to setup the export.
For the Base Resource URL and Microsoft Entra ID Resource URI you can enter the Dataverse URL of the environment the data belongs to.
You can find that in the session details:

The API request details:
| Field | Value |
|---|---|
| Method | POST |
| URL | <orgurl>/api/data/v9.0/ExportToExcel |
| Headers | { "Accept": "application/json", "Content-Type": "application/json"} |
| Body | json{ "View": { "@odata.type": "Microsoft.Dynamics.CRM.savedquery", "savedqueryid": "5287b9ea-9947-45a6-b59f-8a32228db4a5" }, "FetchXml": "@{replace(outputs('Compose_FetchXML'), '\"', '\\\"')}", "LayoutXml": "@{replace(outputs('Compose_LayoutXML'), '\"', '\\\"')}", "QueryApi": "", "QueryParameters": { "Arguments": { "Count": 0, "IsReadOnly": true, "Keys": [], "Values": [] } }} |

Save the file
The output of the HTTP action is a file in base64 format.
You can use the Create file action to create a file in SharePoint:

The output is an Excel file with the requested data and columns:
