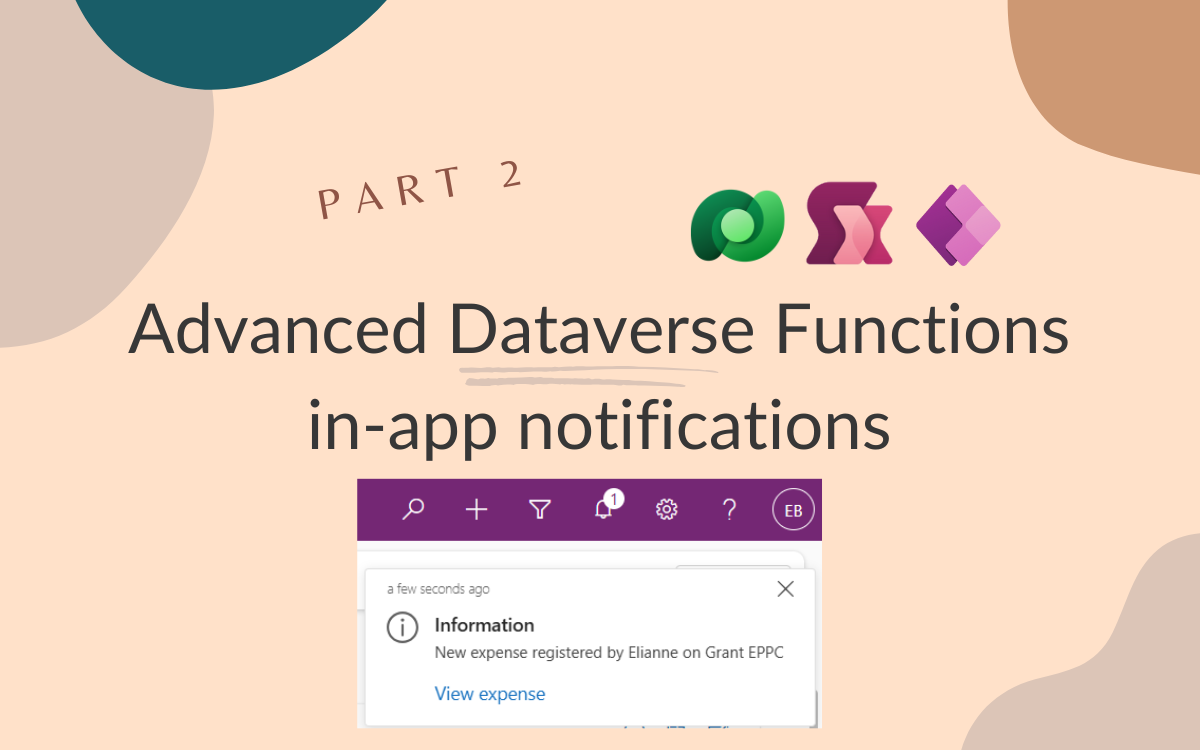
Advanced Dataverse Functions
Nov 4, 2025 • 3 • 543
Table of contents
In my previous blog
, I introduced Dataverse Functions and covered the basics: what they are, how to create them, and why they matter for low-code developers.
Today, we’re taking things to the next level.
We’re going to build a sophisticated notification system that sends real-time, in-app notifications from a Canvas App to a Model-Driven App.
👉 Imagine this: a user submits an expense in a Canvas App, and immediately, an admin sees a notification in their Model-Driven App with a direct link to review it.
This is the kind of cross-app communication that typically requires complex Power Automate flows or external services.
But with Dataverse Functions, we can achieve this elegantly, performantly, and maintainably: all with low-code.
The scenario
The challenge: You’re building an expense management system.
Field users submit expenses via a Canvas App on their phones. Administrators use a Model-Driven App at their desks to review and approve expenses.
The problem: Admins need real-time notifications when new expenses are submitted. They want to see:
- Who submitted the expense
- What it’s for
- A direct link to the expense details
The solution: A Dataverse Function that creates in-app notifications, triggered directly from the Canvas App.
Understanding special actions in Functions
Dataverse Functions support several special actions that pro-code developers have been using in C# plugins for years.
One of the most powerful is creating in-app notifications.
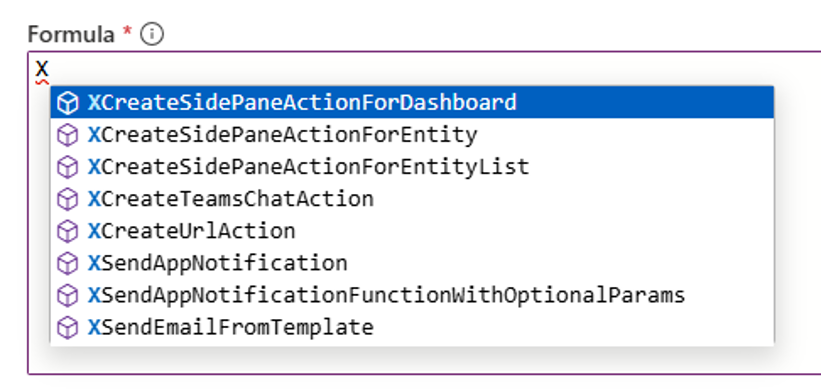
These aren’t email or push notifications — they are native Dataverse notifications that appear in Model-Driven Apps.
They:
- Display in the notification bell icon (top-right corner)
- Can include custom icons and styling
- Support clickable links to specific records
- Persist until dismissed

Building the Notification Function
Step 1: Define your parameters
Create Function SendUpdate.
Input Parameters:
varSendTo(String) – The user ID who should receive the notificationvarTitle(String) – The notification headlinevarMessage(String) – The detailed messagevarExpenseId(String) – The GUID of the expense record
Output Parameters: None (we’re just creating a notification).
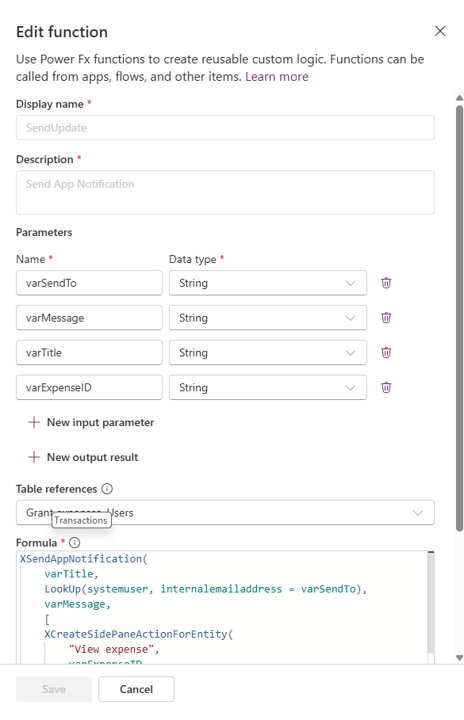
Step 2: Write the Function logic
XSendAppNotification(
    varTitle,
    LookUp(systemuser, internalemailaddress = varSendTo),
    varMessage,
    [
        XCreateSidePaneActionForEntity(
            "View expense",
            varExpenseID,
            "Expense",
            "eur_grant_expense",
            LookUp(
                eur_grant_expense,
                eur_grant_expenseid = GUID(varExpenseID)
            ).eur_grant_expenseid
        )
    ],
    100000000, // success
    200000000, // timed notification
    10,        // expires after 10 seconds
    200000000  // priority normal
)
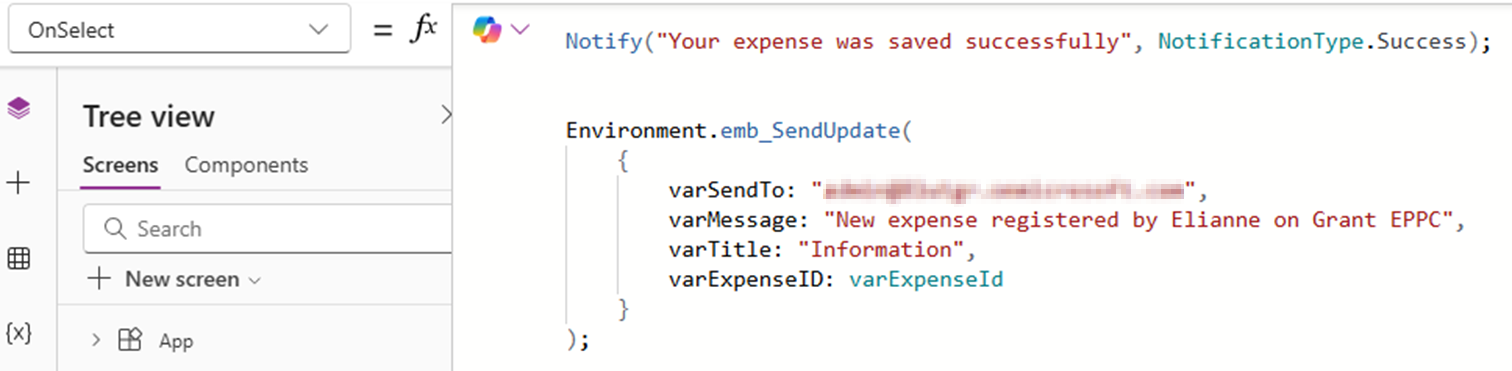
Integrating with Canvas Apps
Step 1: Add Data Source
In your Canvas App, add the Environment table as a data source.
Step 2: Create the submit button logic
// Send the notification
Environment.emb_SendUpdate(
    {
        varSendTo: "xxxxx@xxxxx.com",
        varMessage: "New expense registered by Elianne on Grant EPPC",
        varTitle: "Information",
        varExpenseID: varExpenseId
    }
);
The user experience
The user enters a new expense and from admin’s perspective notification toast appears.
Automatically navigates to the expense record
- ✅ No email clutter
- ✅ No refresh required
- ✅ Instant, contextual communication
Important: Enable in-app notifications
Open your Model-Driven App in the App Designer, go to Settings → Notifications, enable in-app notifications.
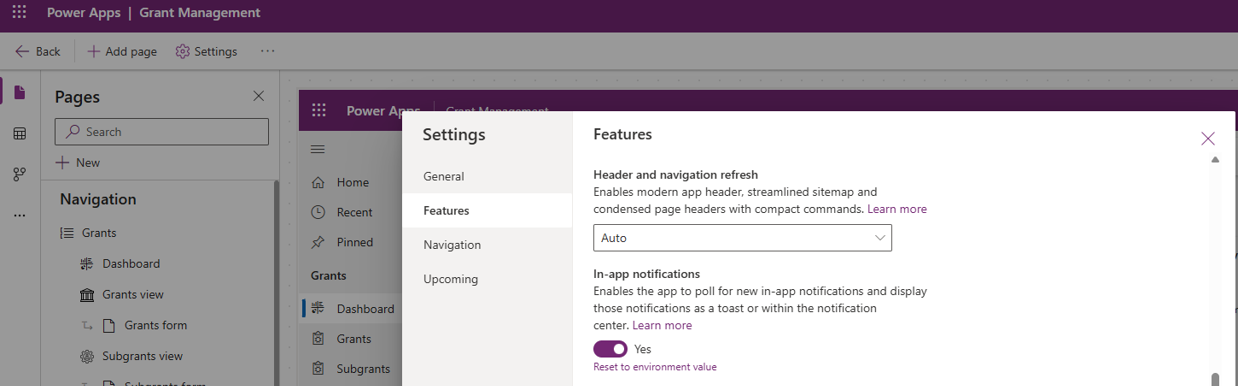
⚠️ Without this, notifications won’t display (though they’ll still be created in the background).
Conclusion
In-app notifications powered by Dataverse Functions provide a professional, native user experience — all built with low-code.
This is just one of the many special actions available in functions. You can also:
- Create activities (emails, tasks, appointments)
- Update related records
- Perform complex calculations
The key takeaway:
Dataverse Functions give you pro-code power with low-code simplicity.